Invoices
Turn your tracked hours into a numbered PDF invoice with a timesheet attached.
On this page
- Fill in your business details once
- Set up the client and the rate
- Make a draft and preview it
- Choose the dates to bill
- Choose who it’s addressed to
- Add notes to the invoice
- Issue the invoice
- How invoices are numbered
- Bill several projects on one invoice
- Billed hours are marked
- Catch older unbilled work
- Mark entries “do not bill”
- Change an invoiced entry
- Check the audit trail
- Find your issued invoices
- Delete an invoice
At a glance
- Set up your business once, and each client and rate once.
- Preview a draft as often as you like; it uses no invoice number.
- Issue numbers the invoice, makes the PDF with a timesheet attached, and marks the hours billed.
- The same hour can’t be billed twice.
- Changes to invoiced time need a reason, and are kept in the audit trail.
TimeTracker can turn the hours you’ve tracked into a numbered PDF invoice, with a timesheet of the work attached. It keeps track of which hours you have already billed, so the same hour can’t be billed twice.
Fill in your business details once
- Open Settings → Your business.
- Type your business name and create it.
- Add your mailing address, and any phone numbers and people you want.
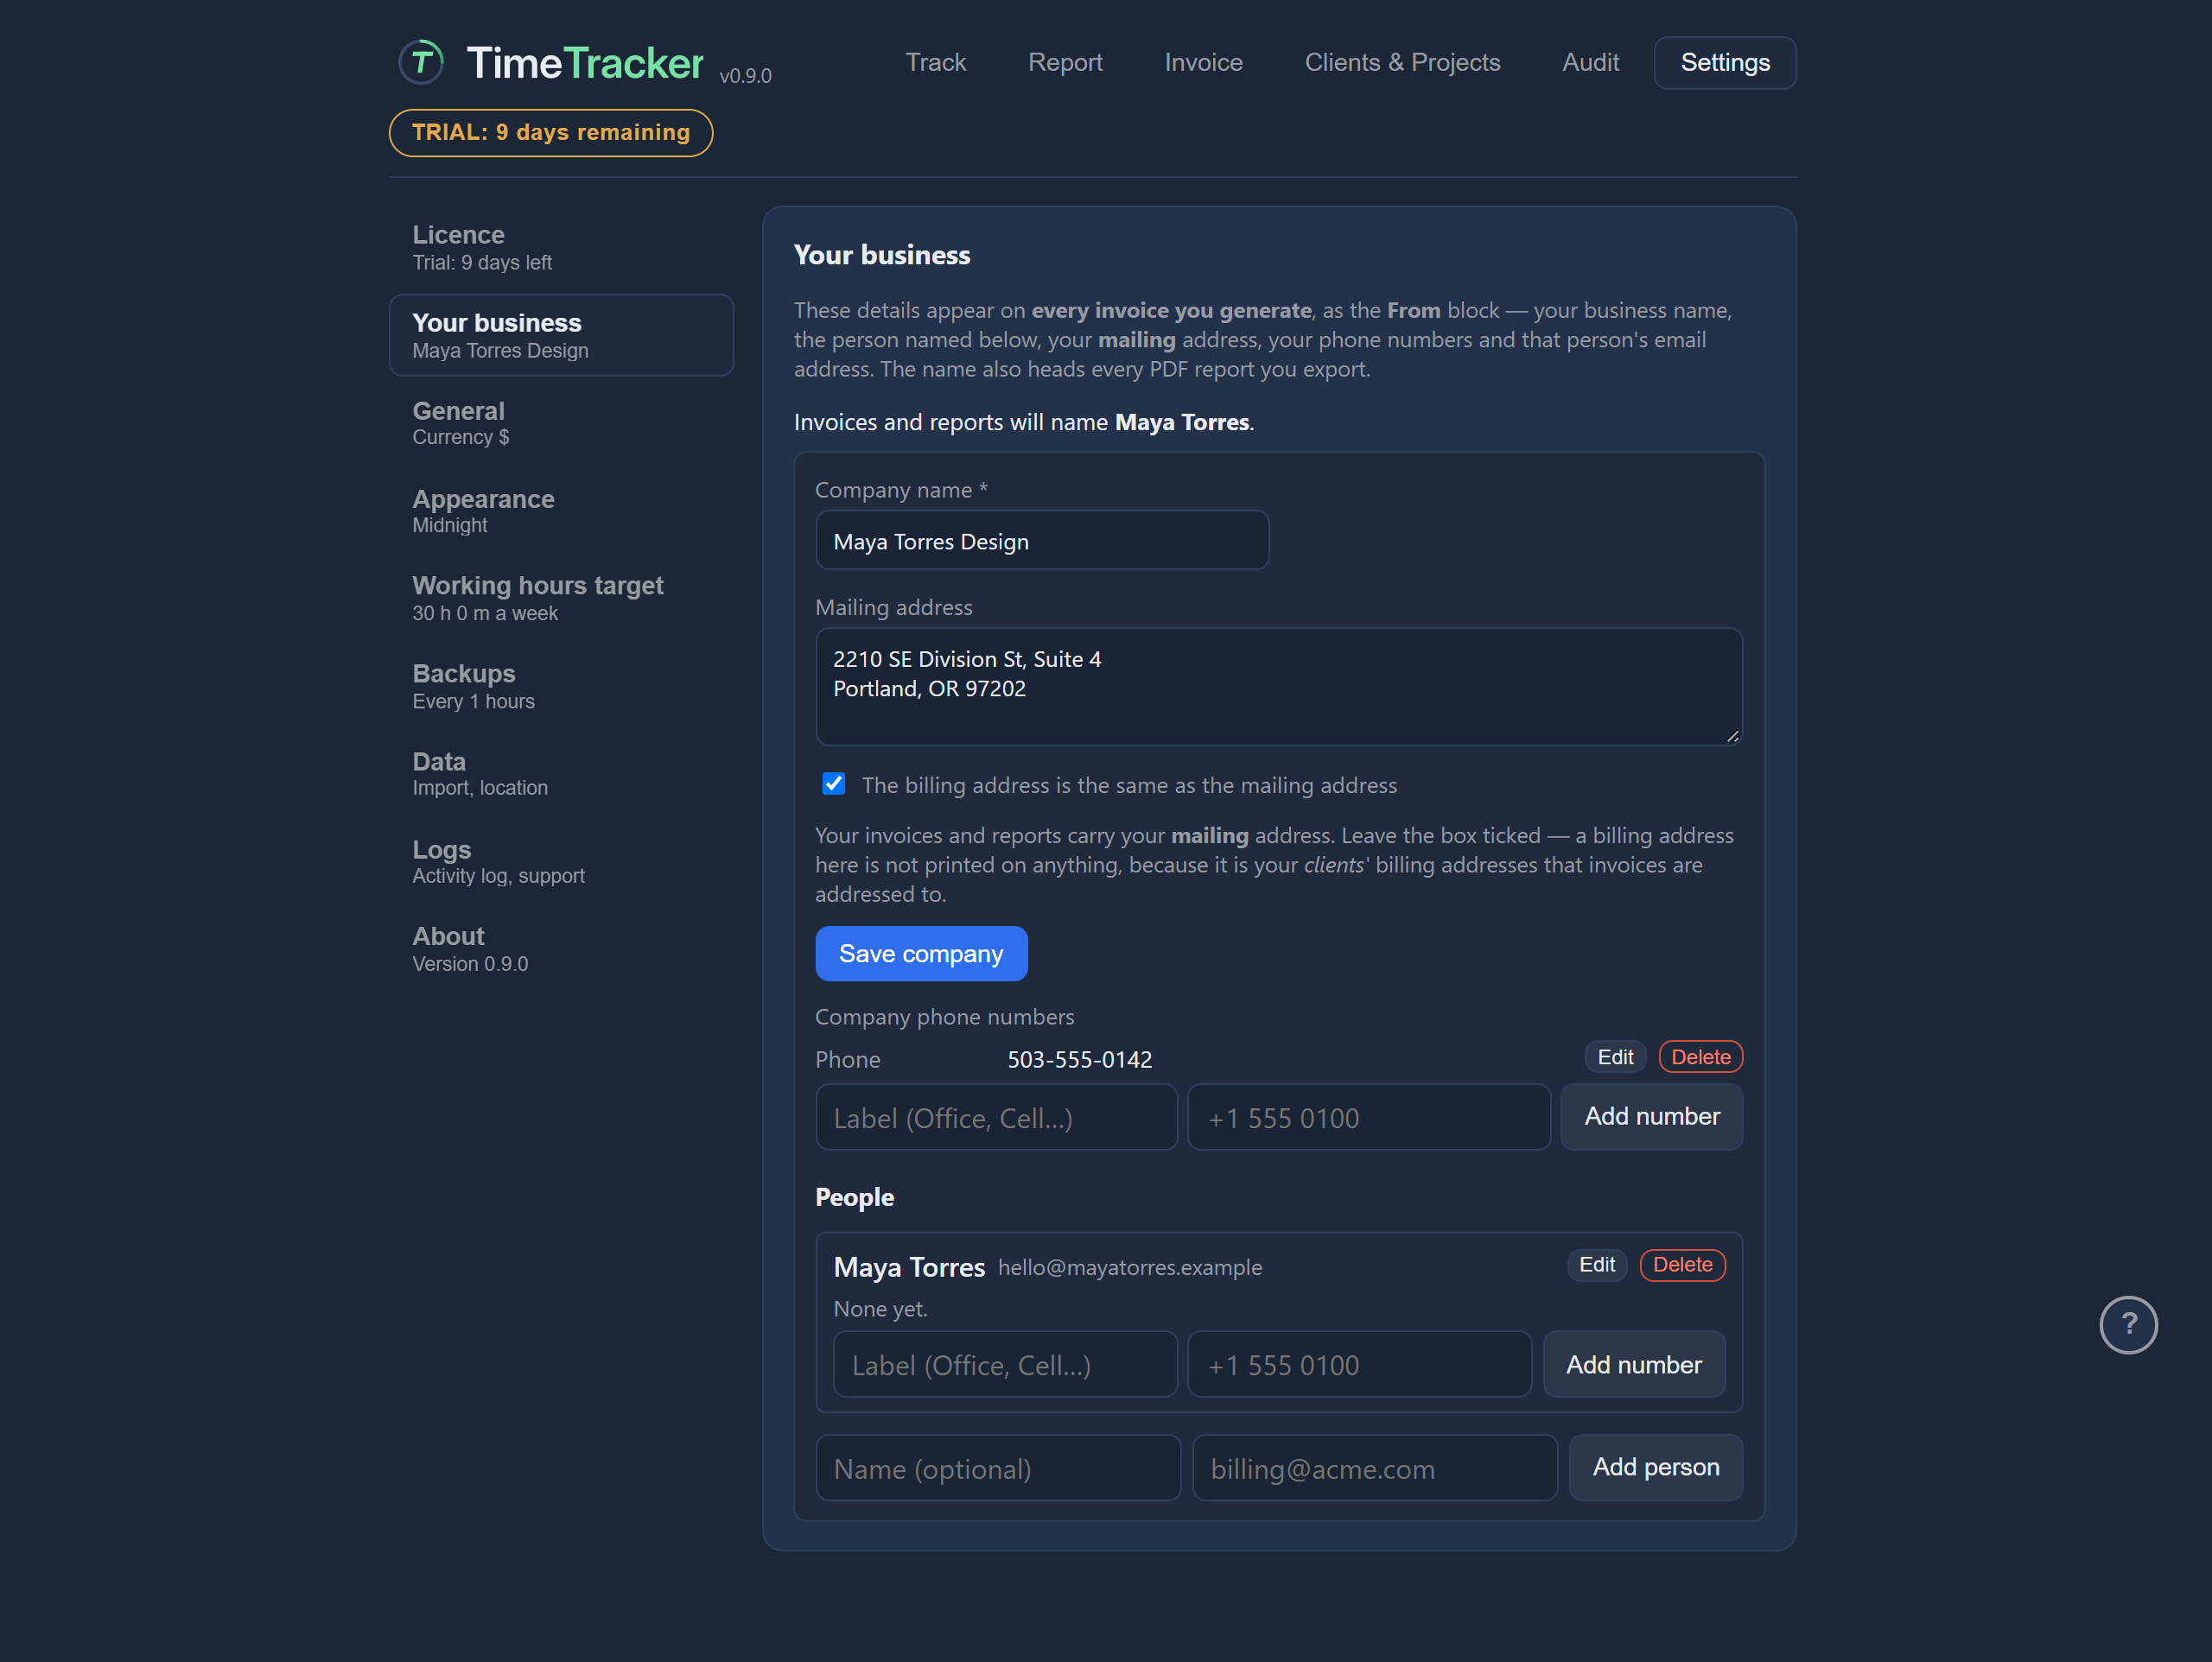
You only do this once. Your name and mailing address become the “From” block on every invoice. If you haven’t set them up, the Invoice tab reminds you. See Your business.
Set up the client and the rate
- Open the Clients & Projects tab.
- Add the client and its billing address (or tick that billing and mailing are the same).
- Add the client’s projects, give each one an hourly rate, and press Save.
Make a draft and preview it
- Open the Invoice tab.
- Choose the client to bill.
- Choose the dates (see below).
- If you like, add notes and choose who the invoice is addressed to.
- Press Preview.
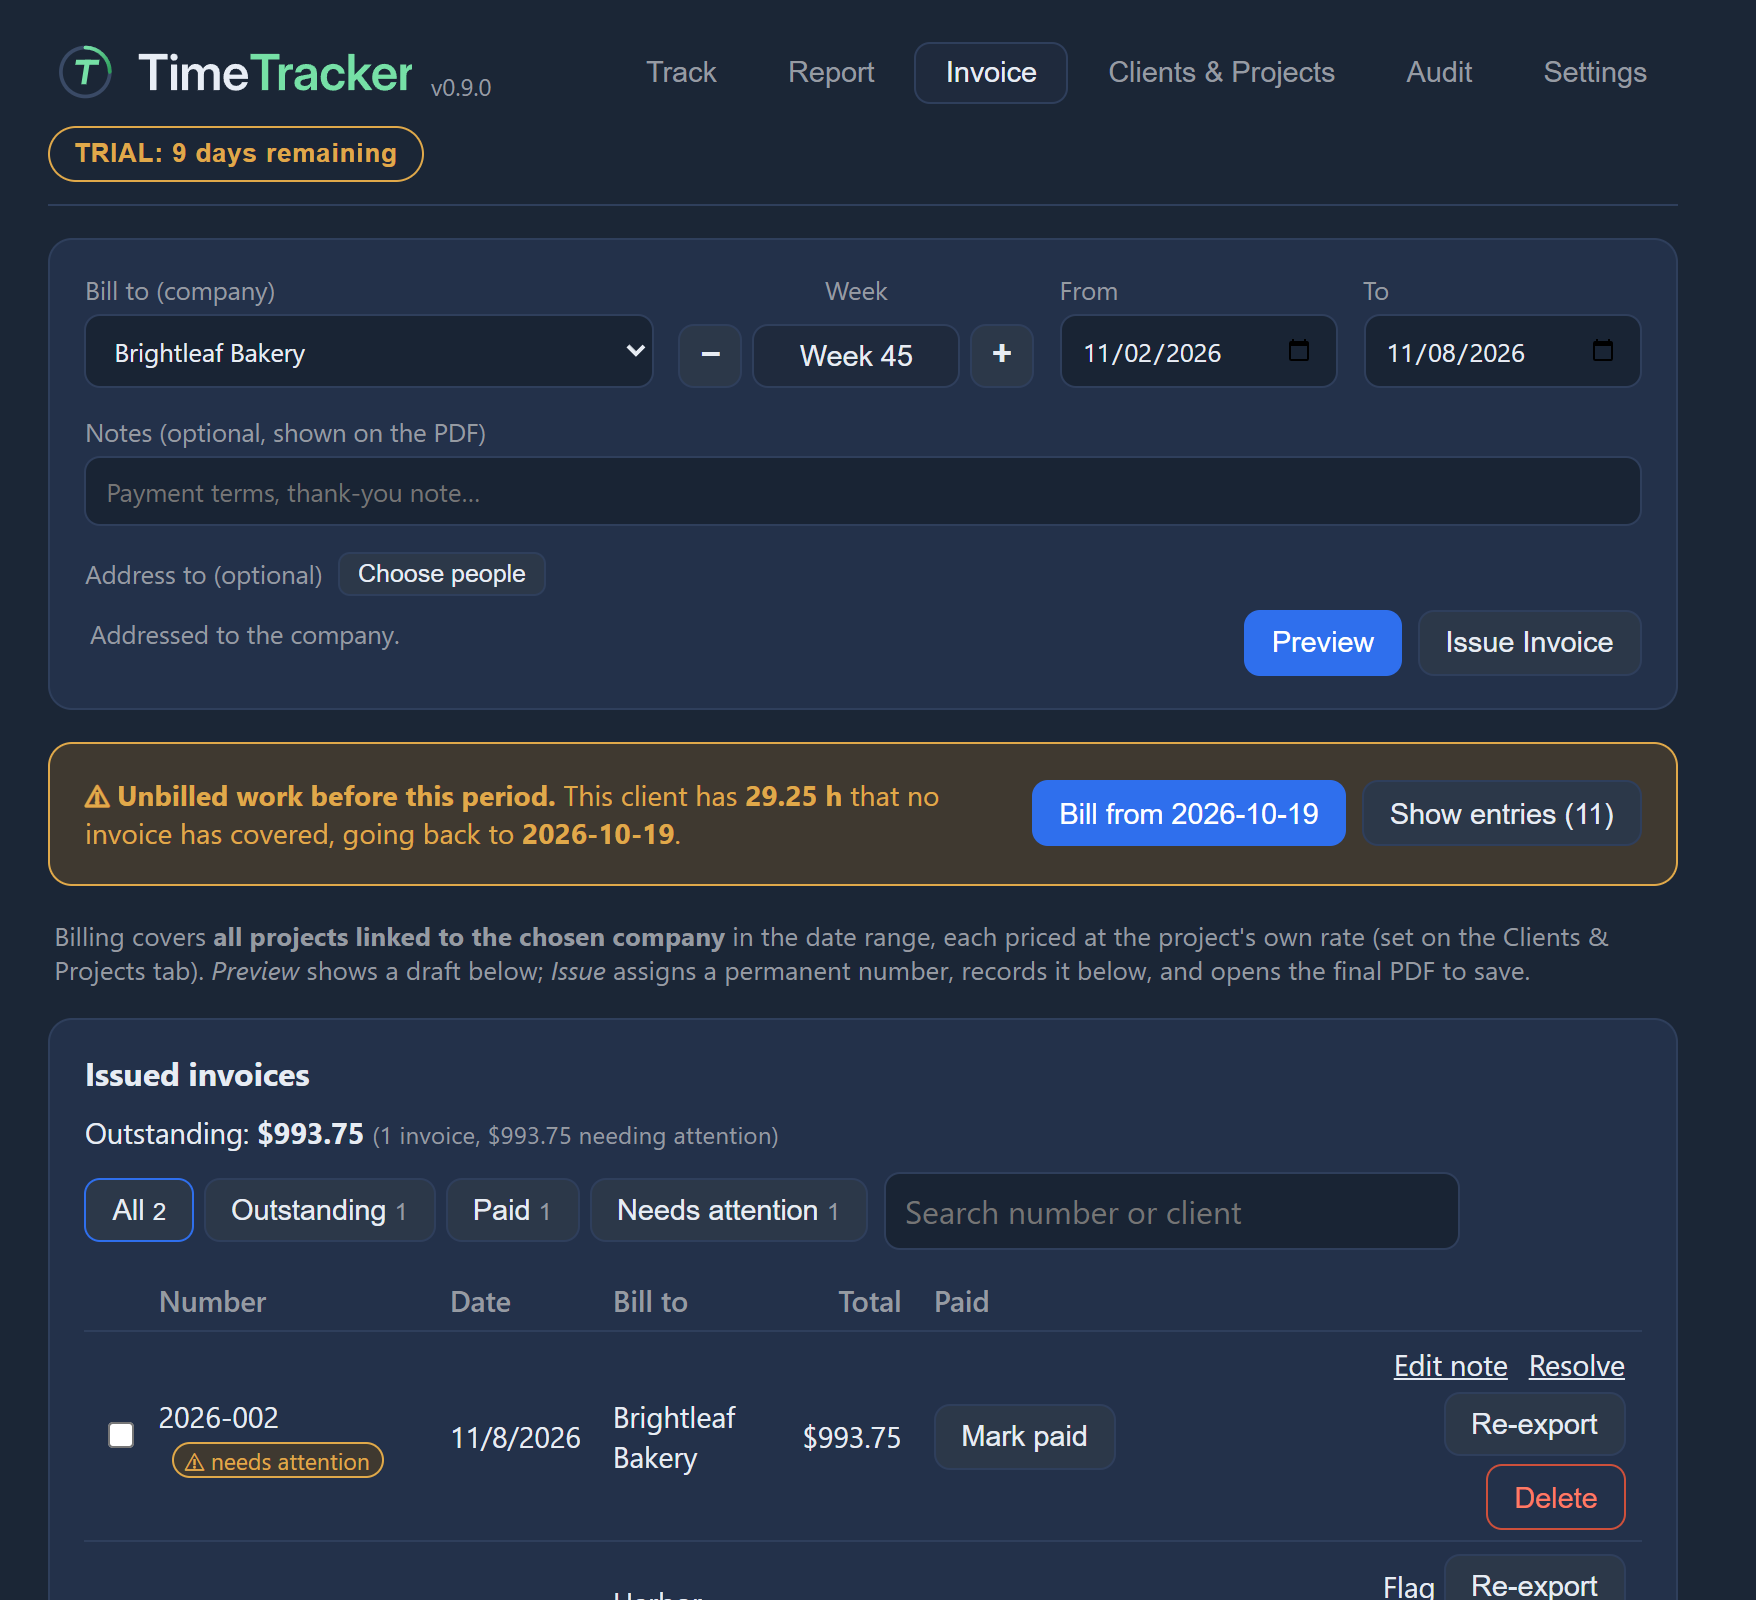
A draft of the invoice appears below, on the same page, marked DRAFT.
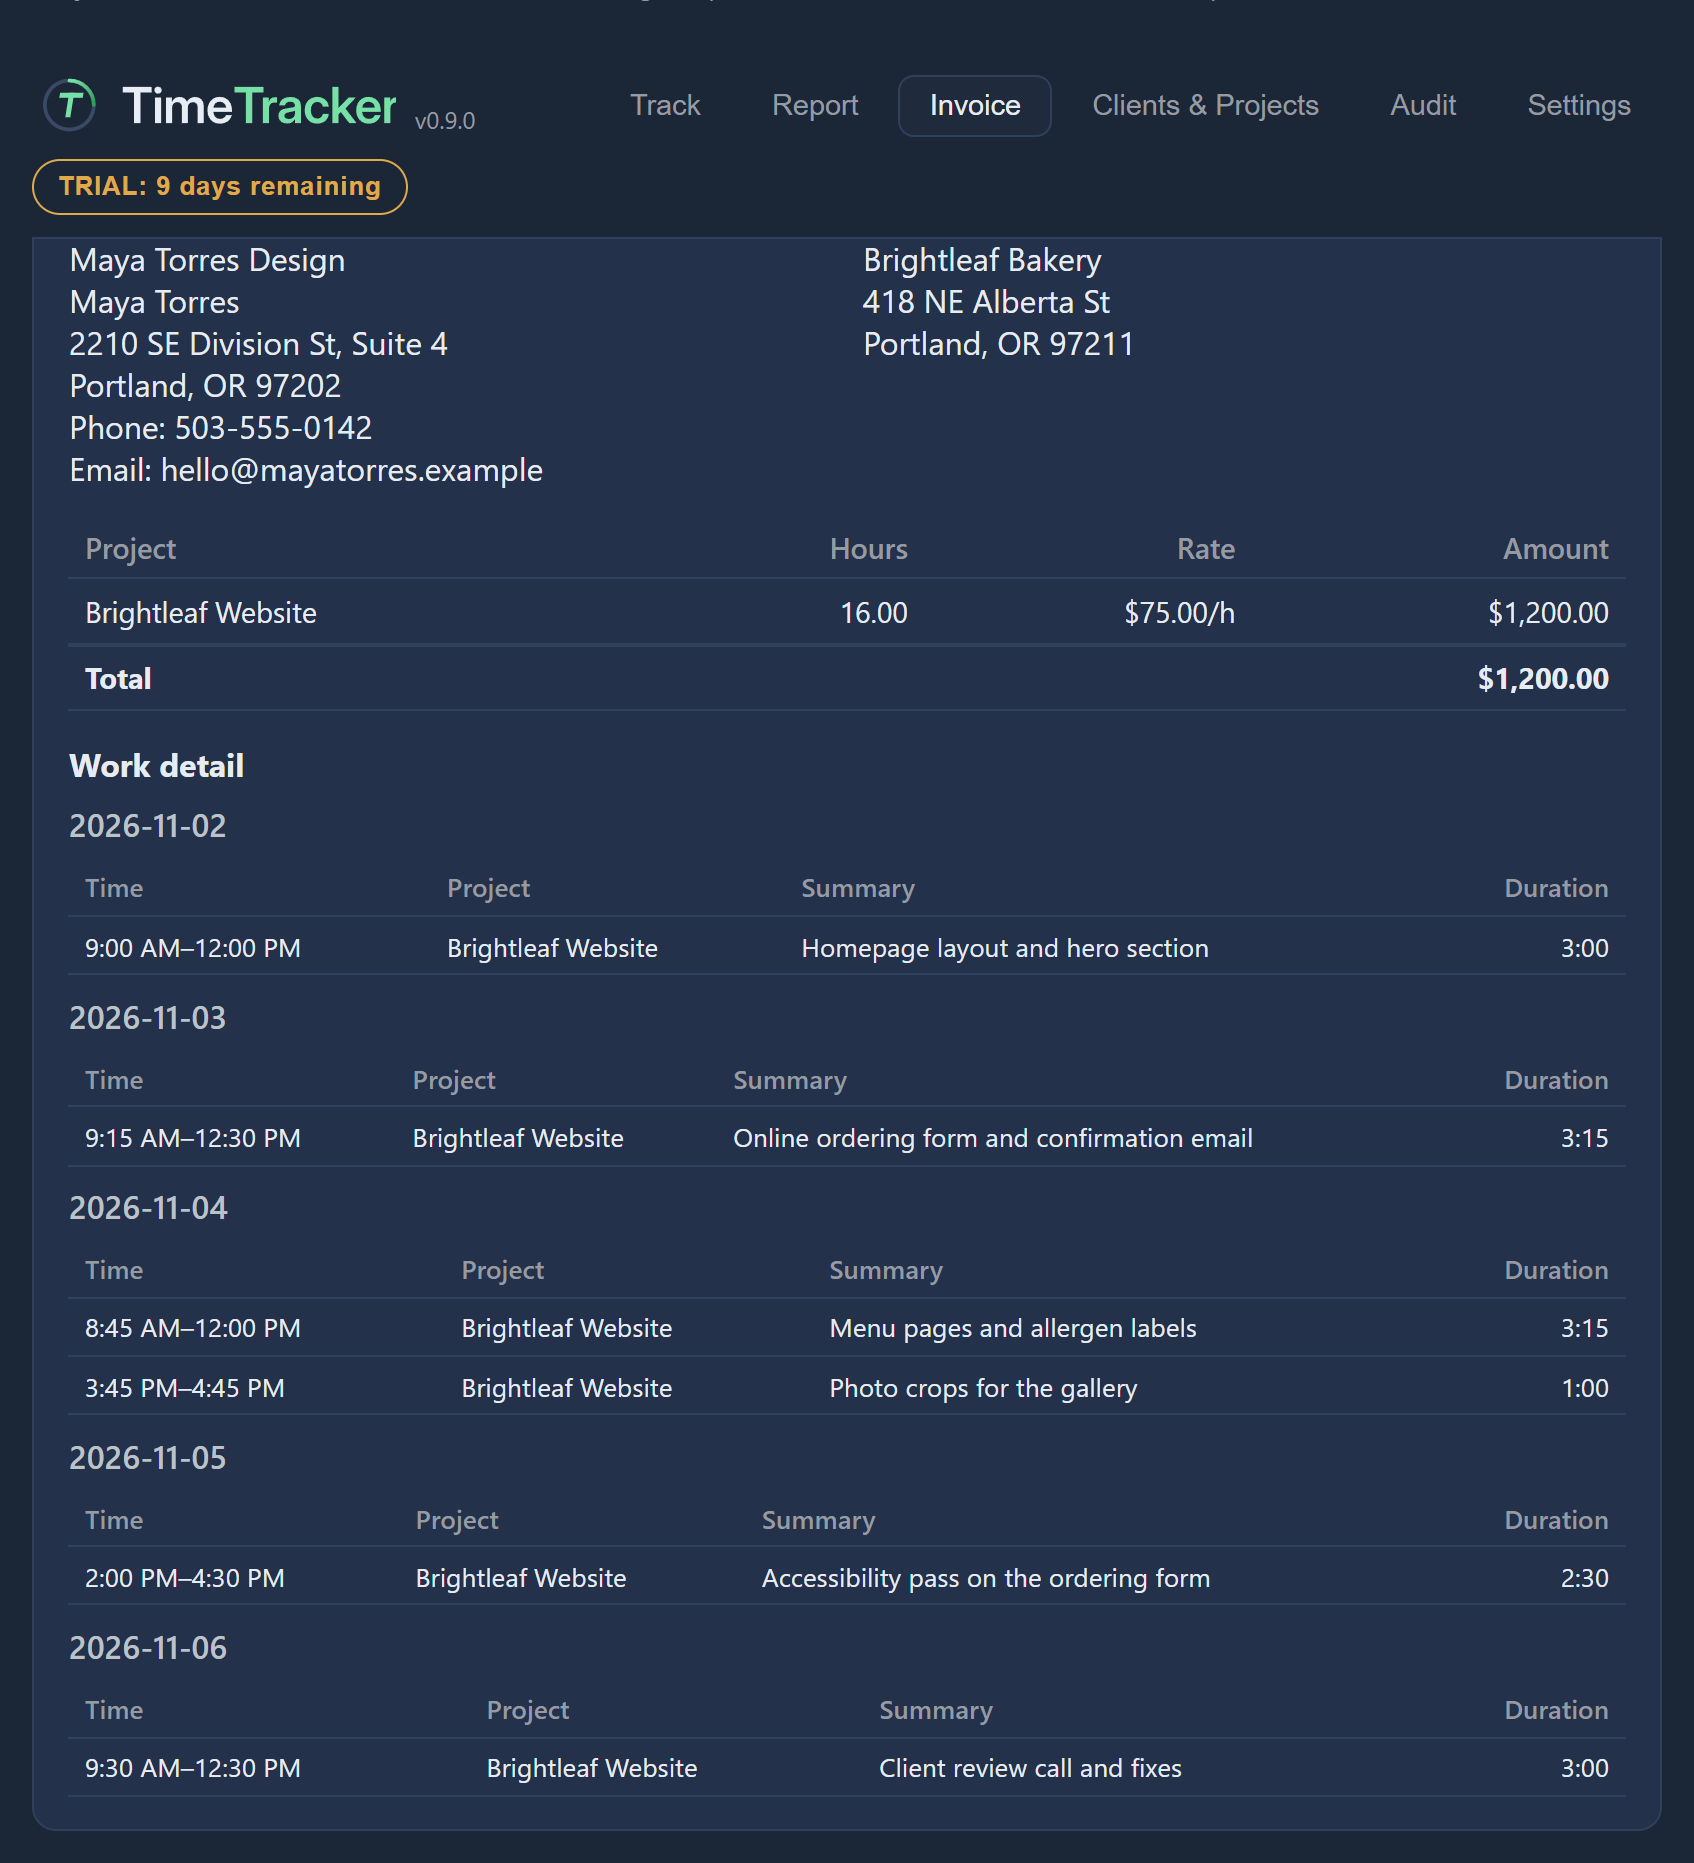
The draft shows one line per project, with the hours, the project’s rate and the amount, and the total. Below that is the work detail: every entry behind those lines, grouped by day, so your client can see exactly what the hours were.
Choose the dates to bill
You can bill a whole week or any range of dates.
| Choose | How it works |
|---|---|
| A week | Use − and + to step one week at a time. Click the week to jump back to the current week. On a Monday, last week is included too. |
| Any range | Set the first and last day of work to bill. |
Every entry for the client’s projects that overlaps the dates is billed, except entries that are:
- already on an invoice
- marked do not bill
- still running
- dated in the future
Choose who it’s addressed to
You choose which of the client’s people the invoice is addressed to.
- Open the list of people.
- Tick the people to address it to. Type in the box to find someone by name or email.
- Press Done.
To take someone off, remove them from the list of recipients. If nobody is picked, the invoice is addressed to the company.
The people come from the client’s details. See Add people at a client.
Add notes to the invoice
You can add notes, which are printed on the invoice. Use them for payment terms or a thank-you.
Issue the invoice
When the draft looks right, press Issue. TimeTracker then:
- gives the invoice the next number
- makes the PDF, with the work-detail timesheet attached
- marks the entries on it as billed
- fixes what the invoice says, so later changes to rates, addresses or formats don’t alter it
How invoices are numbered
Invoices are numbered in order: 2026-001, 2026-002, and so on.
Bill several projects on one invoice
An invoice covers every project linked to the client in the dates you chose. Each project gets its own line, at its own hourly rate.
Billed hours are marked
Once hours are on an issued invoice, they are marked billed. That means the same hour can’t be billed twice by mistake.
Catch older unbilled work
If the client has work from before the dates you chose that no invoice has covered yet, TimeTracker warns you. It’s advice only and doesn’t stop you issuing.

From the warning you can:
- show or hide the entries that make up the unbilled work,
- press Bill from followed by the date of the oldest unbilled work (for example Bill from 2026-10-05, in your date style) to move the start date back so this invoice covers it, or
- mark any of those entries do not bill, which takes them out of the warning.
Mark entries “do not bill”
Mark an entry “do not bill” when you did the work but don’t want to charge for it, such as pro-bono time. It still counts as time worked in reports and totals, but it never goes on an invoice. The entry shows a badge so you can tell.
Use the entry’s do-not-bill button in the list of entries, on the Track tab or on a day of the Report tab. Press it again to make the entry billable again.

You can’t mark an entry do not bill if it is still running or is already on an invoice.
Change an invoiced entry
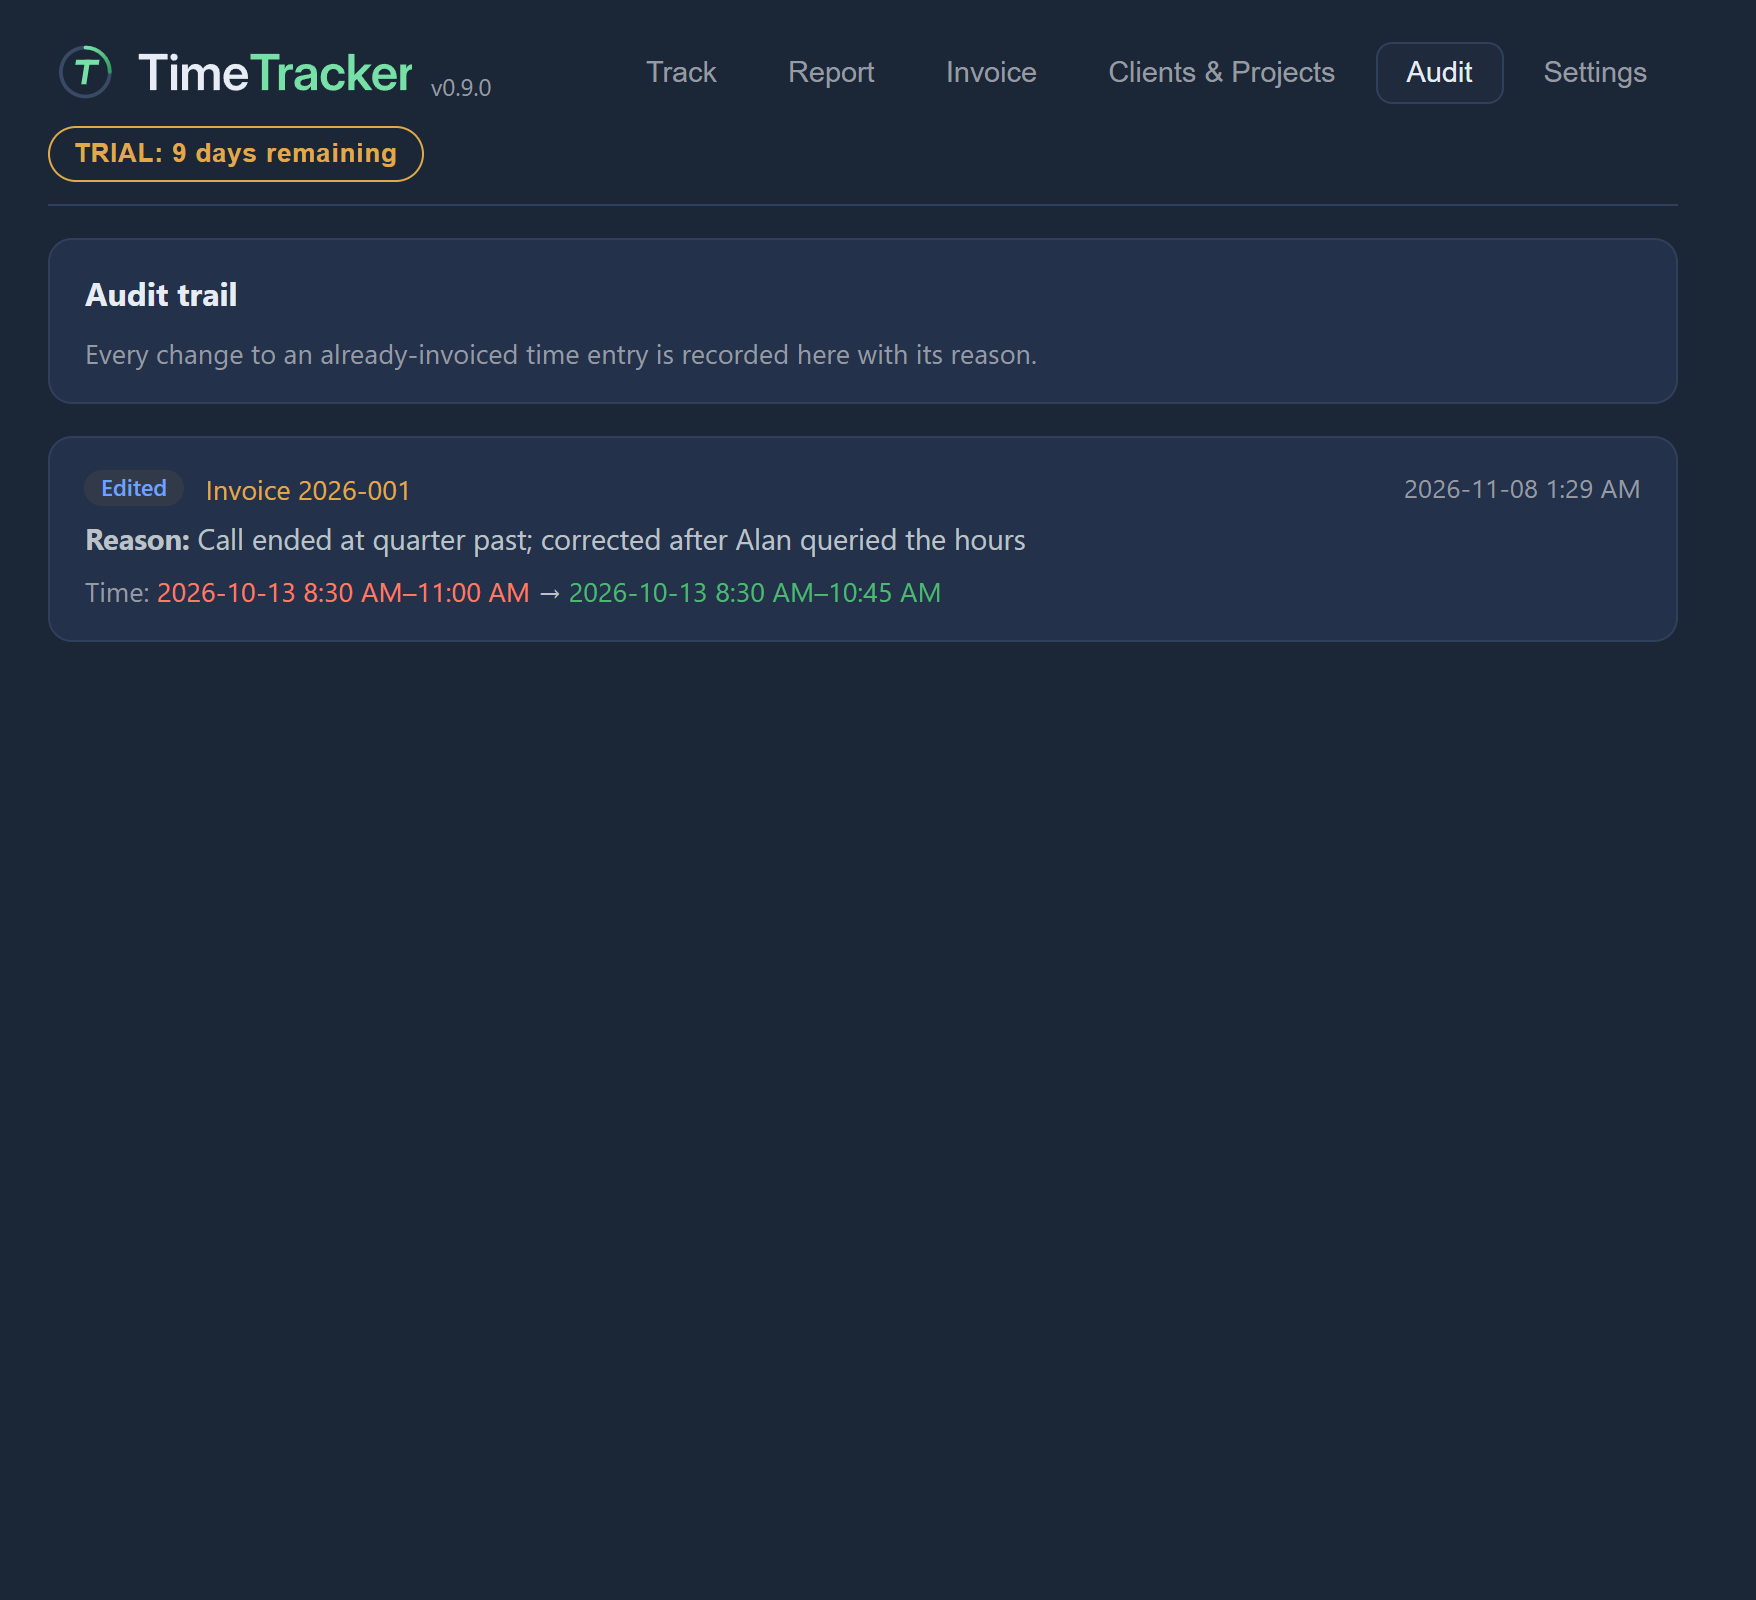
You can still edit or delete an entry after it has been invoiced, but you must write a reason. The reason, and what changed, go into the audit trail.
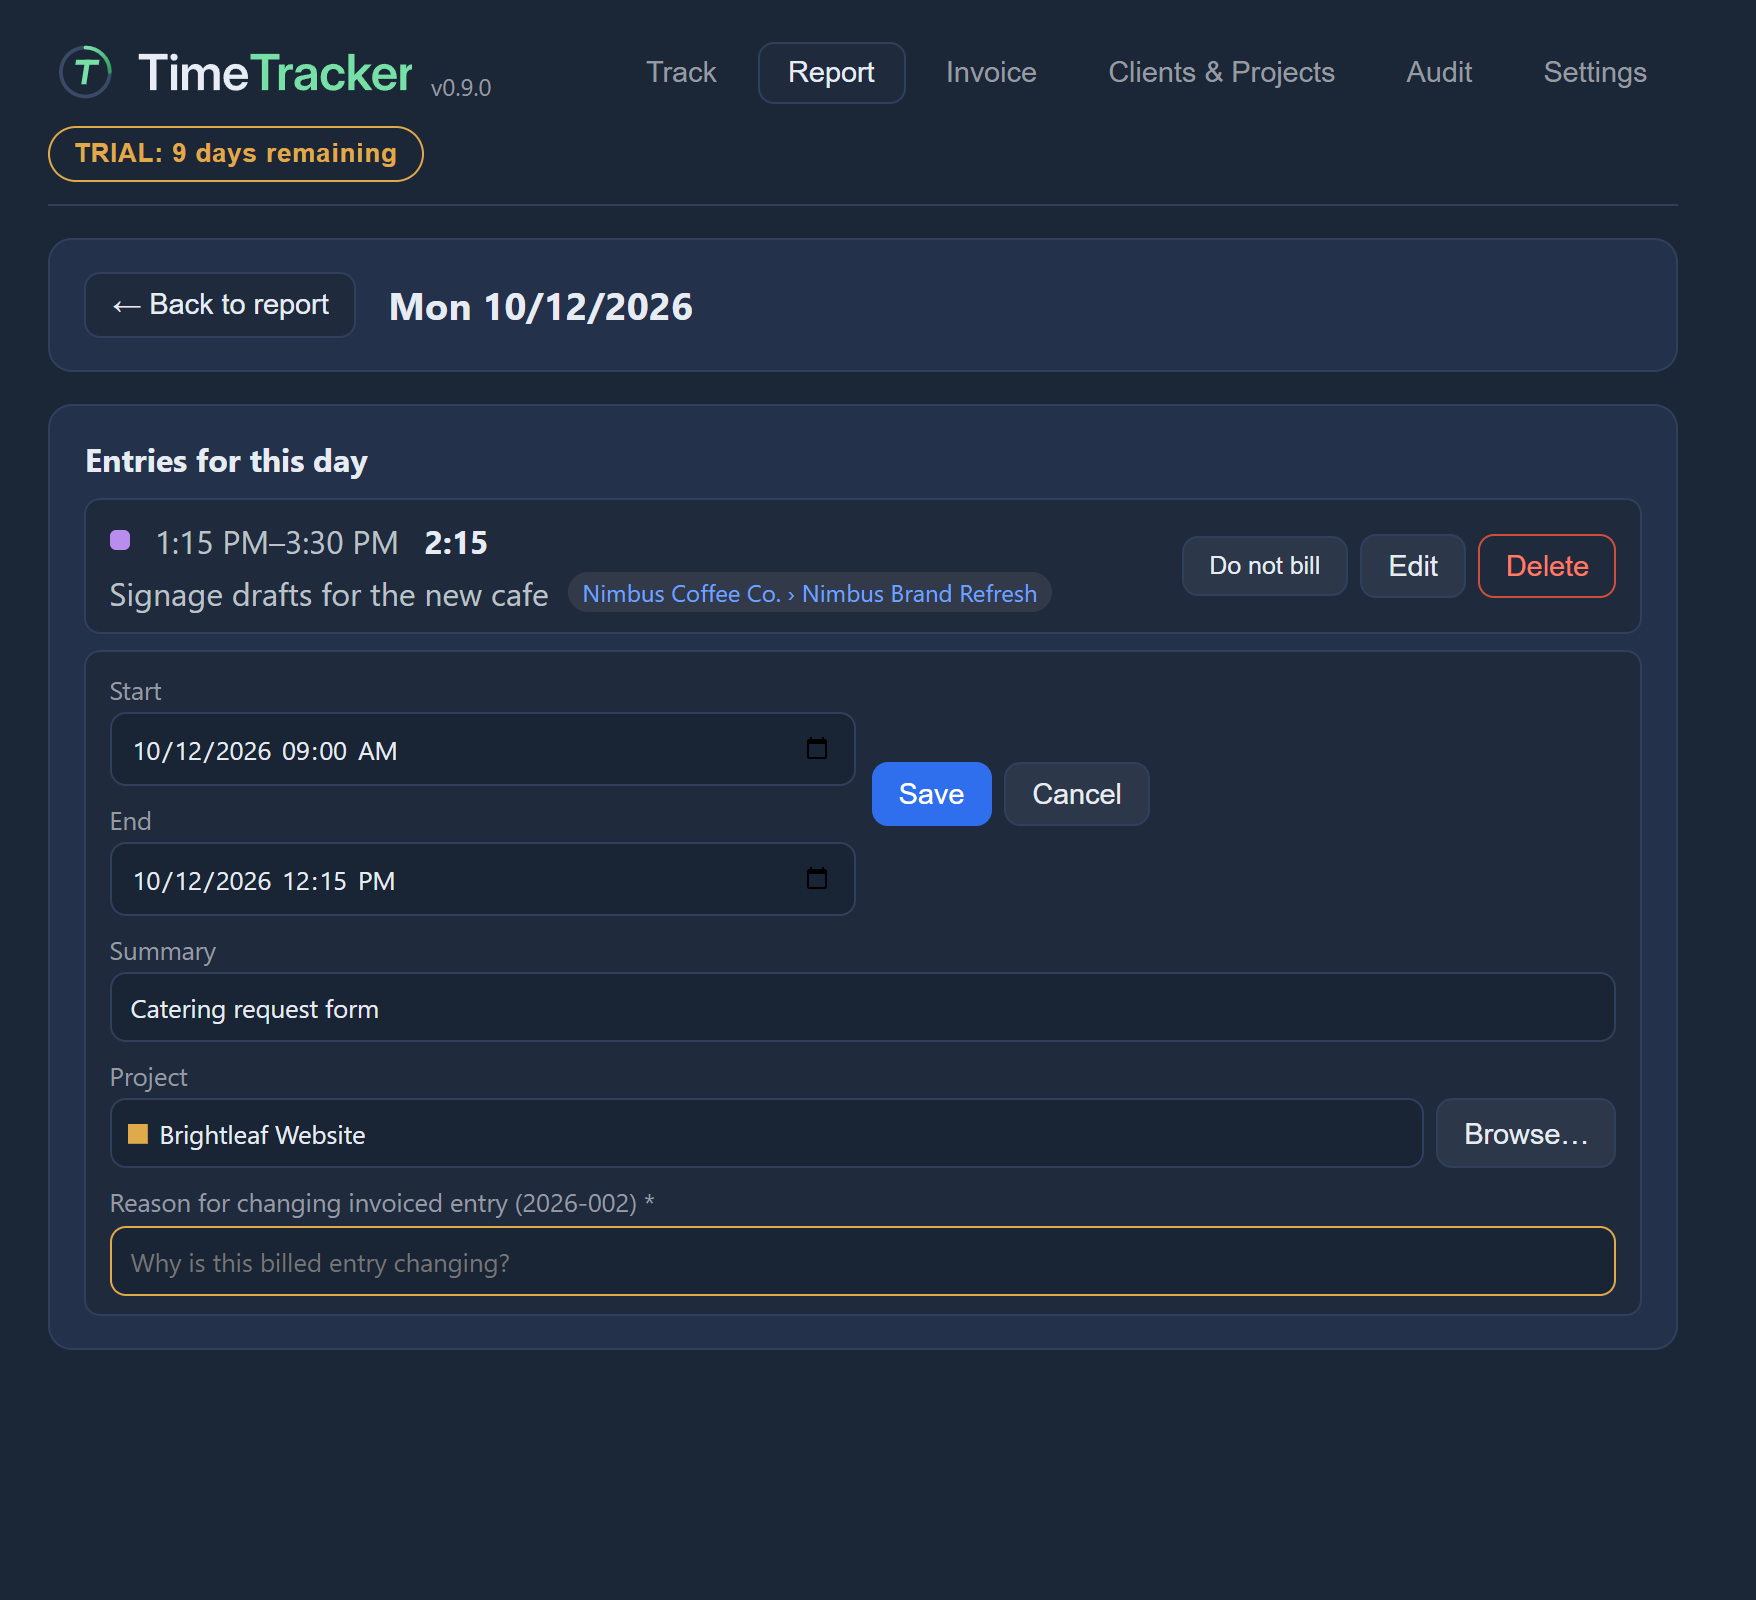
Check the audit trail
Every change to an entry that was already on an invoice is kept in a permanent audit trail, on its own Audit tab, under the heading “Audit trail”.
Each record shows:
- whether the entry was edited or deleted
- which invoice it was on
- when the change was made
- the reason you gave
- what the entry was before and what it became
Find your issued invoices
The Invoice tab lists every invoice you have issued. Each row shows the number, the issue date, the client, the total and whether it has been paid. Its buttons are at the right of the row.
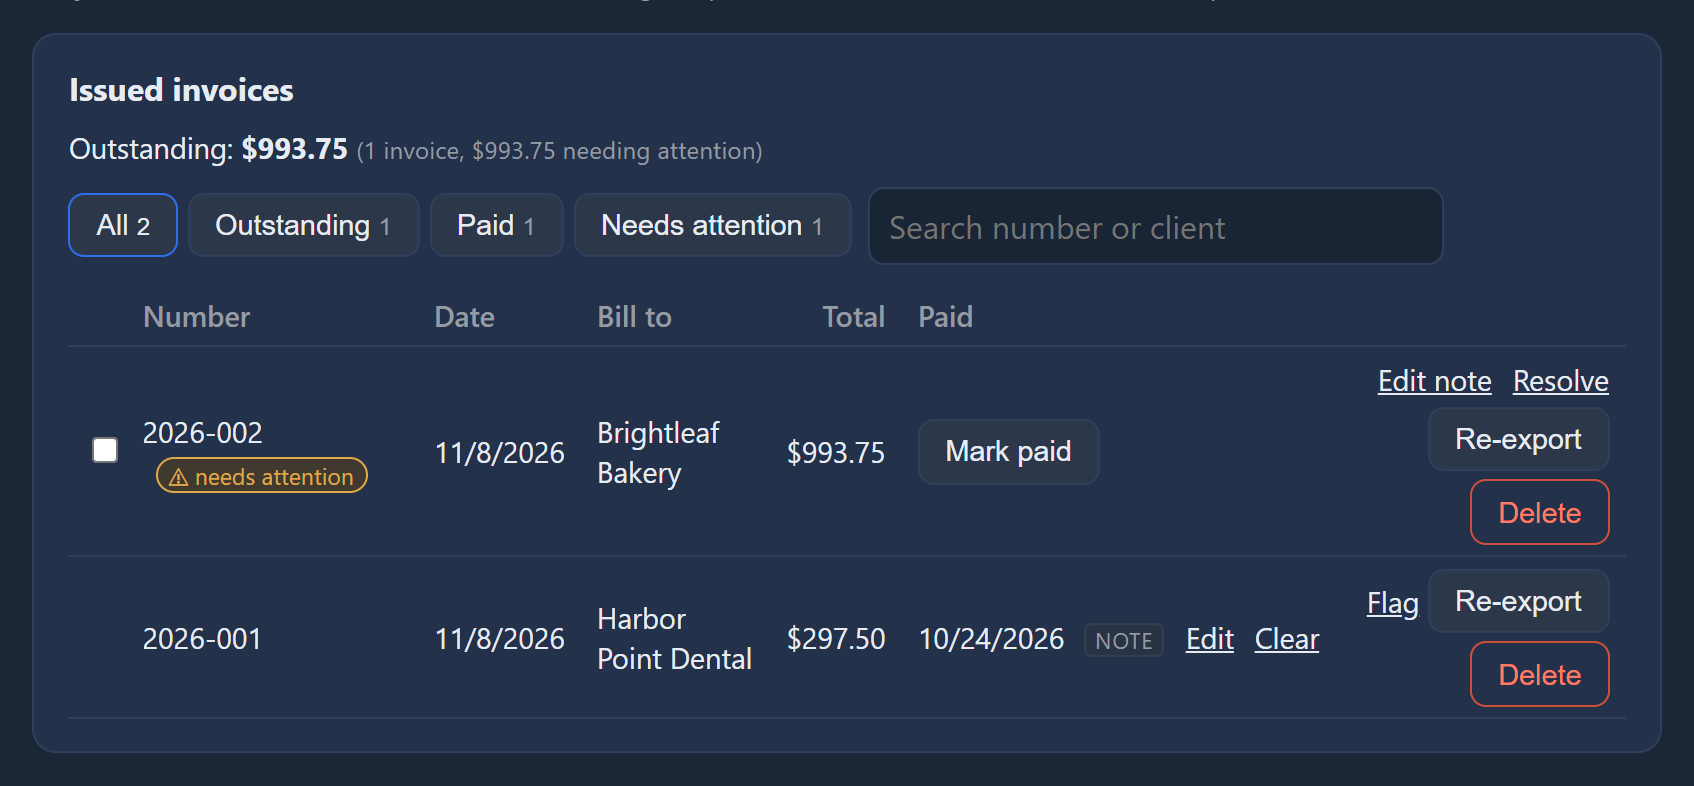
- Search by invoice number or client name.
- Filters narrow the list. The number beside each filter is how many invoices it shows.
- Open the PDF again from the row. It opens exactly as it was issued.
The list also shows what is still owed. See Payments.
Delete an invoice
You can delete an issued invoice from its row, after you confirm. Its number is not used again.