Tracking time
Start, switch and stop the timer, write a note on your work, and fix past entries.
On this page
- Start a task
- Switch to the next task
- Stop the timer
- Write a note on what you did
- Choose a project
- Browse your projects
- See today’s total
- Track your weekly target
- Find time with no project
- Read the list of entries
- Edit a past entry
- Delete an entry
- Fix overlapping entries
- Entries dated in the future
- After a crash or power cut
At a glance
- Press Start task when you begin, Switch task when you move on, Stop when you finish.
- Write one short line about what you did. Your client reads it.
- A project is optional, and you can add one later.
- You can fix, delete or mark “do not bill” any past entry.
- A running timer survives a crash or a power cut.
Tracking is the heart of TimeTracker. Reports, invoices and budgets are all built from the entries you make here, on the Track tab.
Start a task
- In the box at the top, type what you are about to work on. This becomes the note on the entry.
- If you like, choose a project (see below).
- Press Start task.
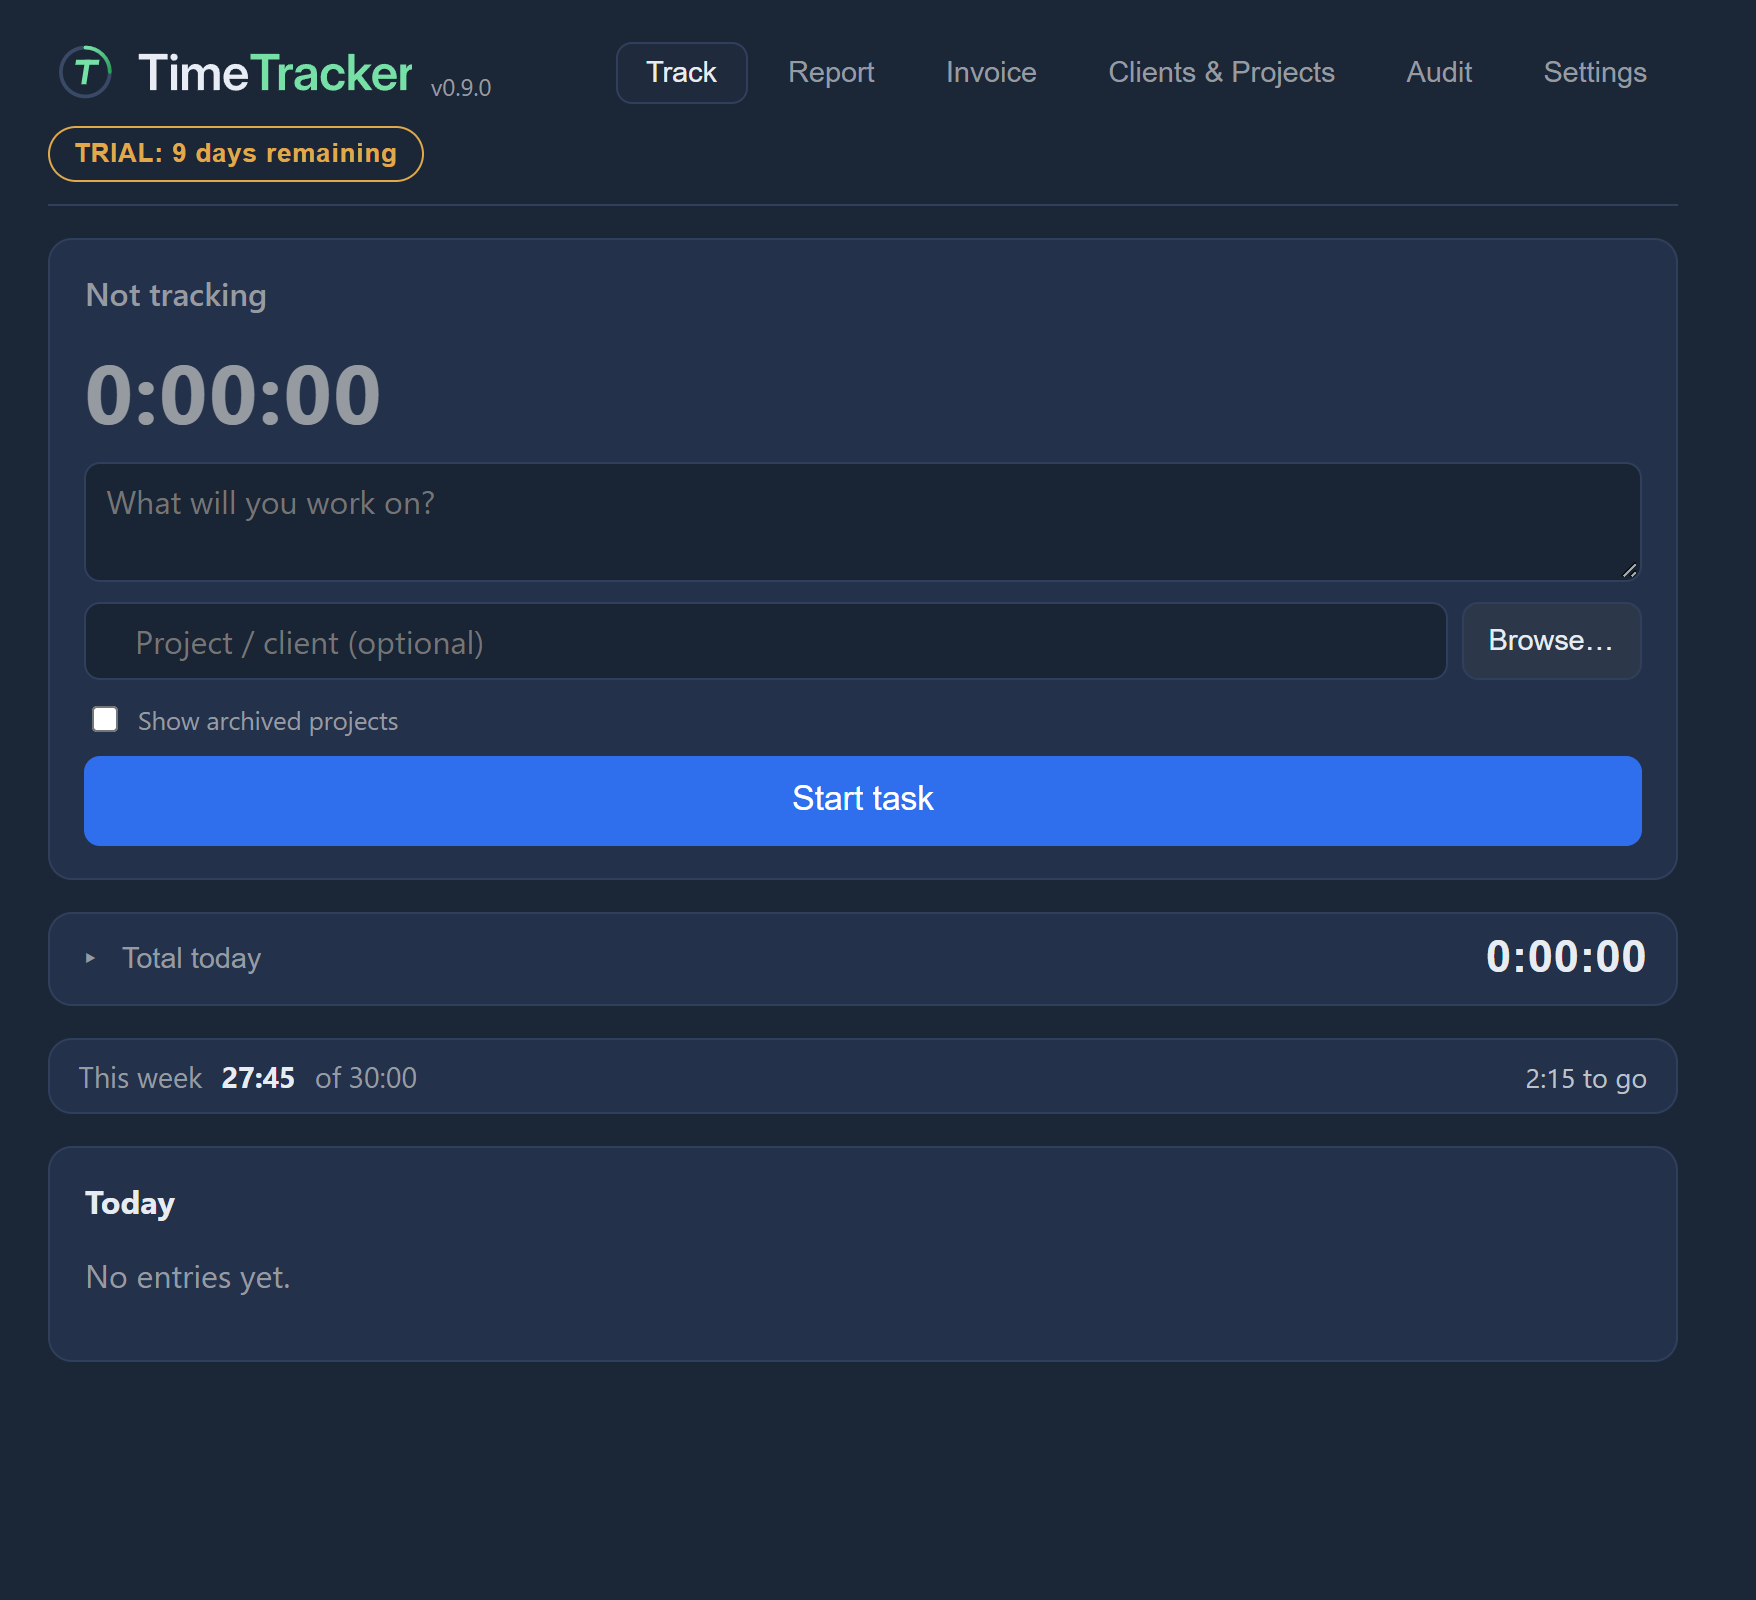
A live timer counts up until you stop or switch. While it runs, the buttons are Switch task and Stop.
Switch to the next task
Switch task closes the running entry, saving its note, and starts a fresh timer in the same click. There is no gap between the two entries and no overlap.
- Press Switch task when you move on to the next piece of work.
- The note box empties. Write a note for the new task in it.
- Choose its project. The new entry always starts with no project, so pick one if it belongs to one.
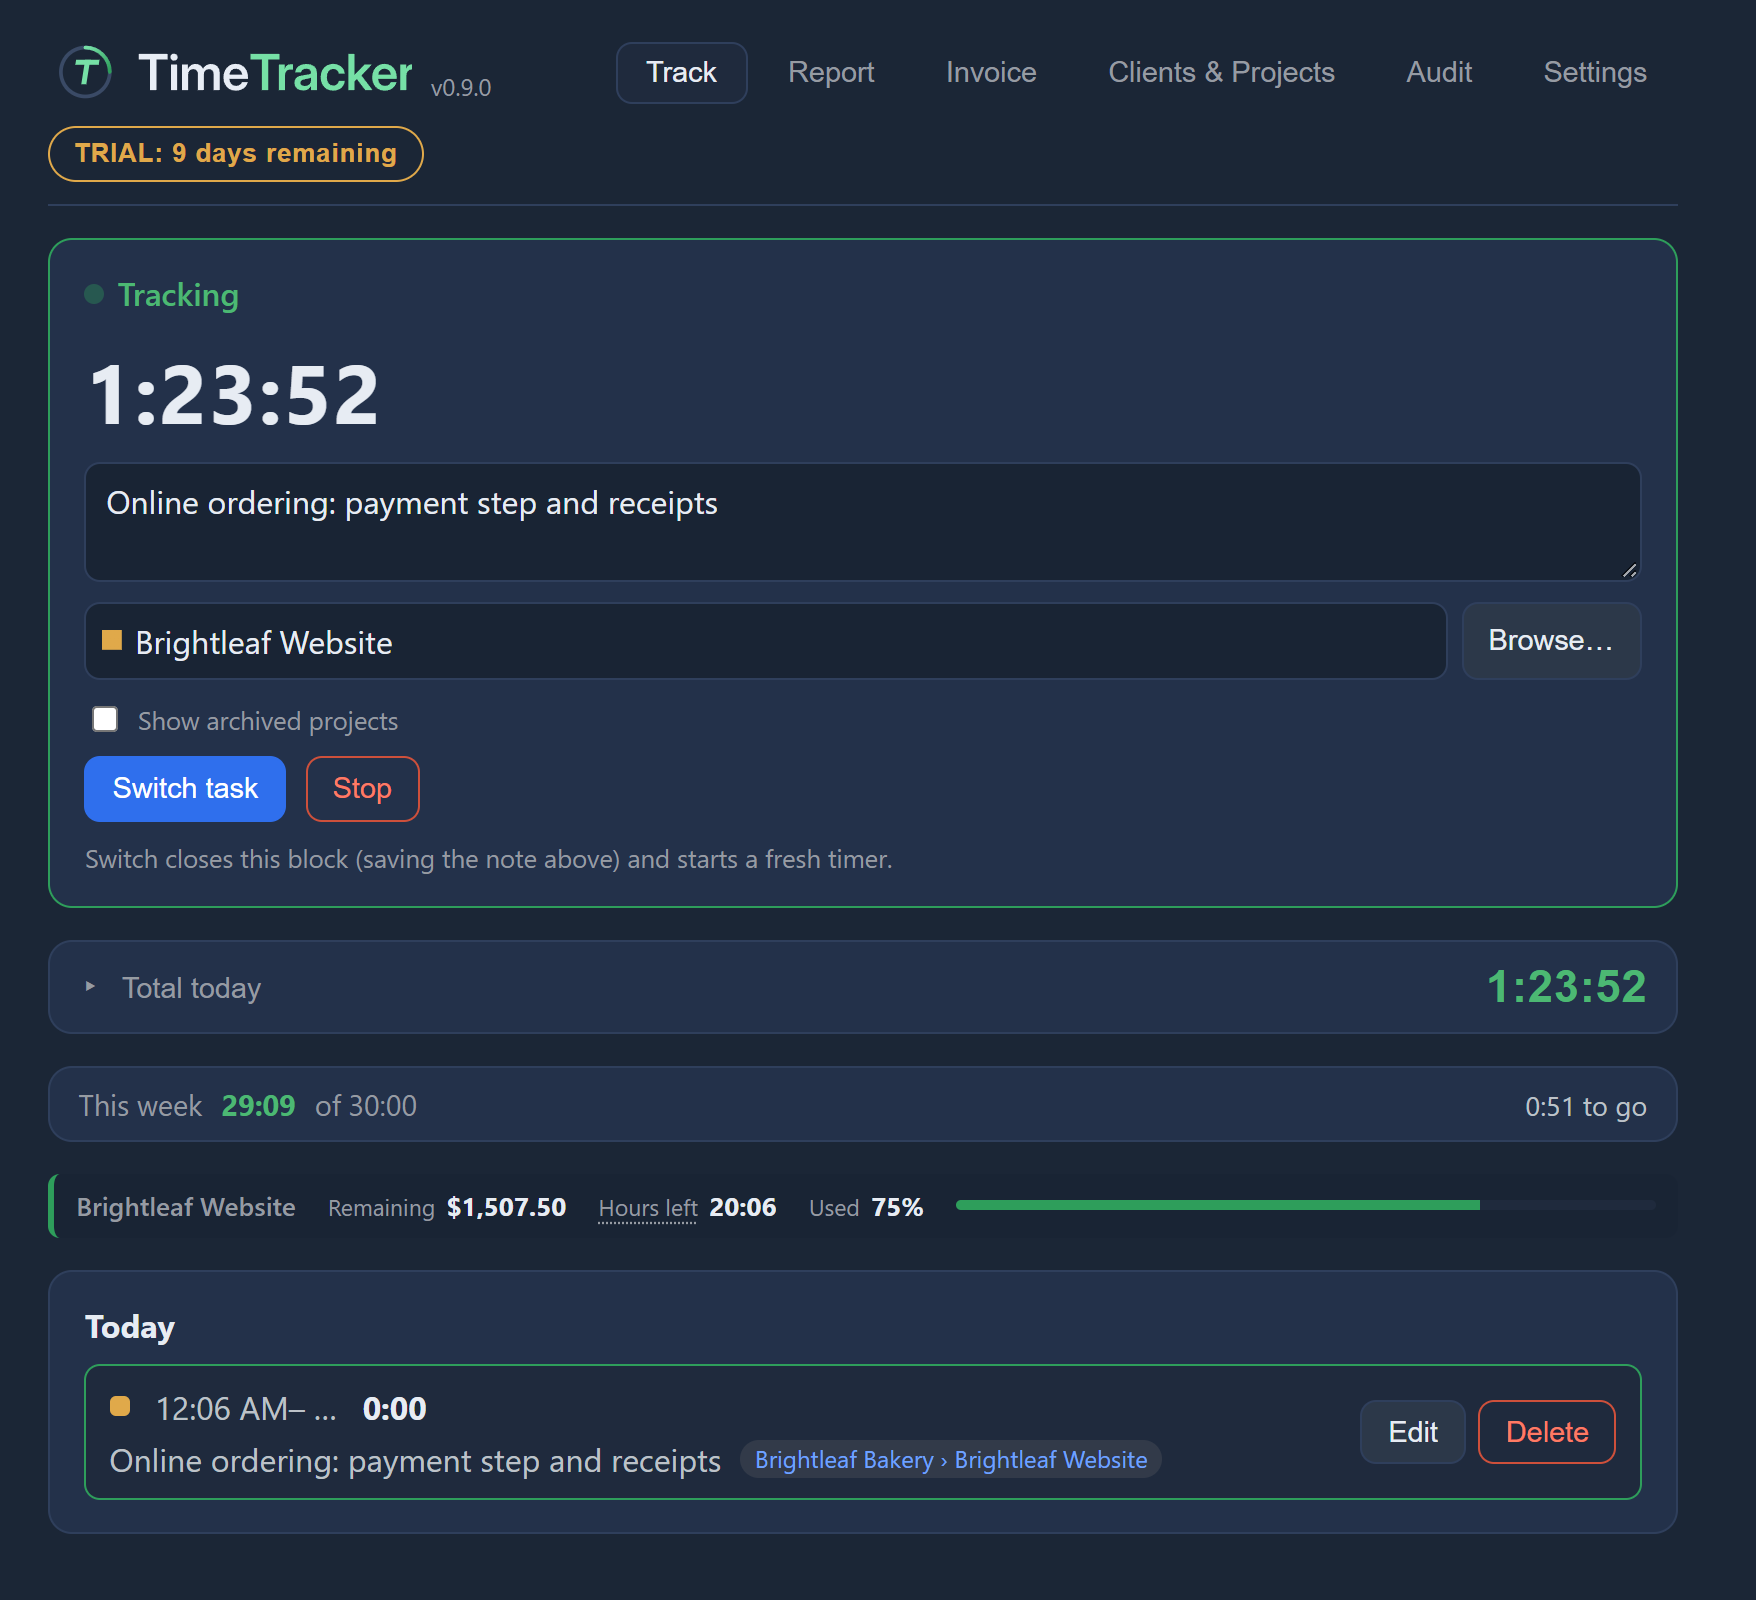
The old note stays on the entry that was closed.
Stop the timer
Press Stop to end the running task. The entry is saved.
Write a note on what you did
Each entry has a short note, its summary, about what you did. It appears on reports and in the work detail attached to an invoice, so your client will read it. Keep it short and specific.
While a task is running, you can change its note in the box. The change is saved when you click away from the box.
Choose a project
The project tells TimeTracker which client the time is for. The entry’s rate and colour also come from the project.
In the project box you can:
- pick a project from the list, which narrows as you type,
- use Browse… to find one by client (see below), or
- type a new name to create a new project there and then.
The project is optional. Leave it empty for time with no project. That time is still recorded and counts in today’s total, but not in this week’s total (see Time with no project). You can add a project later by editing the entry.
To set up projects properly, with a client and a rate, see Clients and projects.
Browse your projects
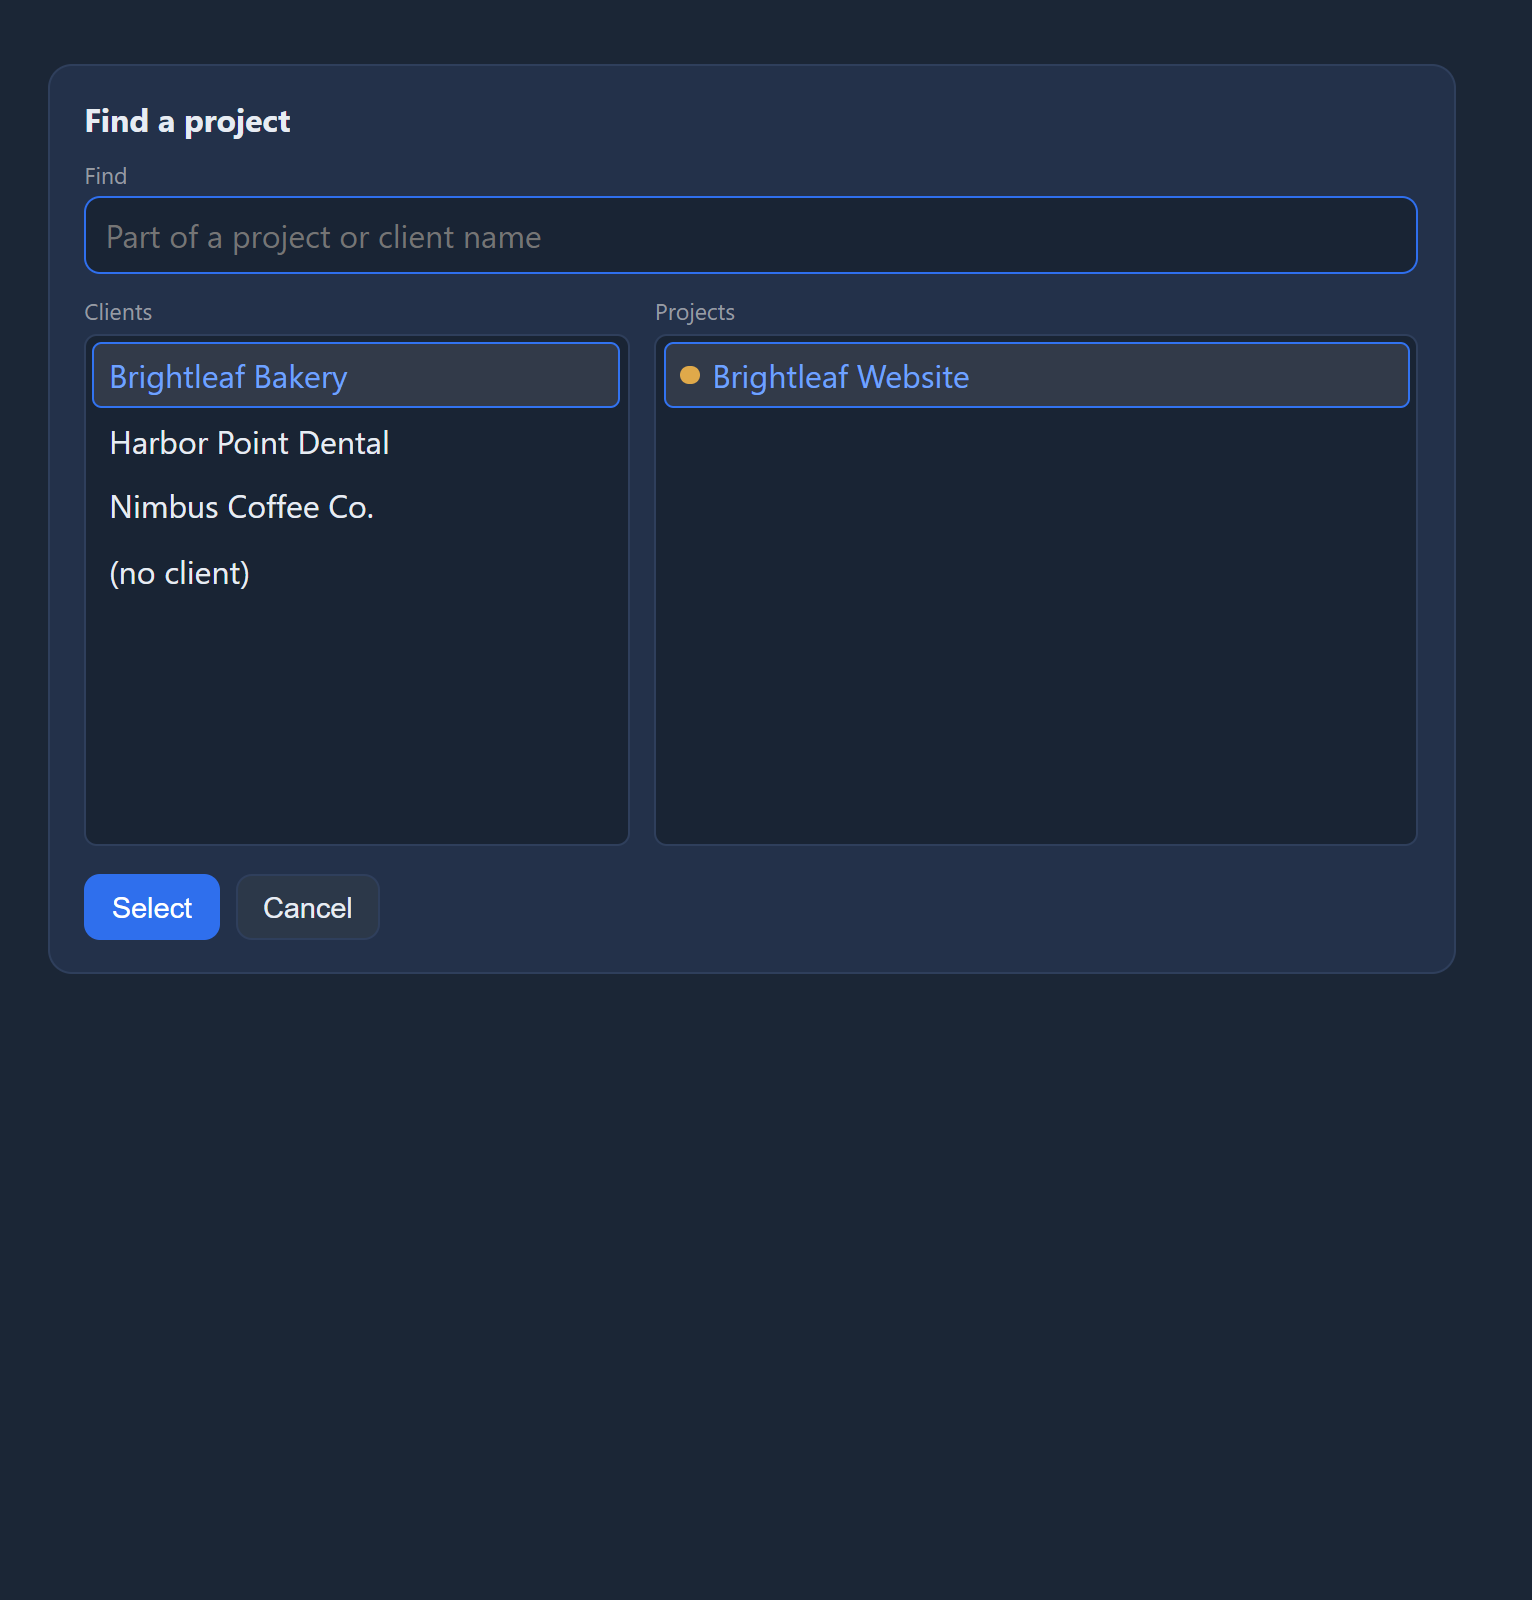
If you can’t remember a project’s name, press Browse… beside the project box. It shows every project, grouped by client, so you can pick one from the list.
See today’s total
The Track tab shows all the time you have tracked today, including the task running now.
Click the total to open a breakdown by project. For each project that has a budget, the breakdown also shows how much budget is left. Click it again to hide the breakdown.

While a project with a budget is running, a budget strip under the timer shows the money and time left on it. See Budgets.
Track your weekly target
The Track tab also shows the hours you have worked on projects this week, against a weekly target if you have set one. Weeks run Monday to Sunday.
Next to it you see how much is left to go, that the target is met, or how far over it you are.

The weekly target covers every project, including ones with no client such as admin. You set it in Settings → Working hours target. See Weekly and daily targets.
Find time with no project
This week’s total only counts time that has a project. Time with no project is shown separately, so you can see where the missing hours went.
Read the list of entries
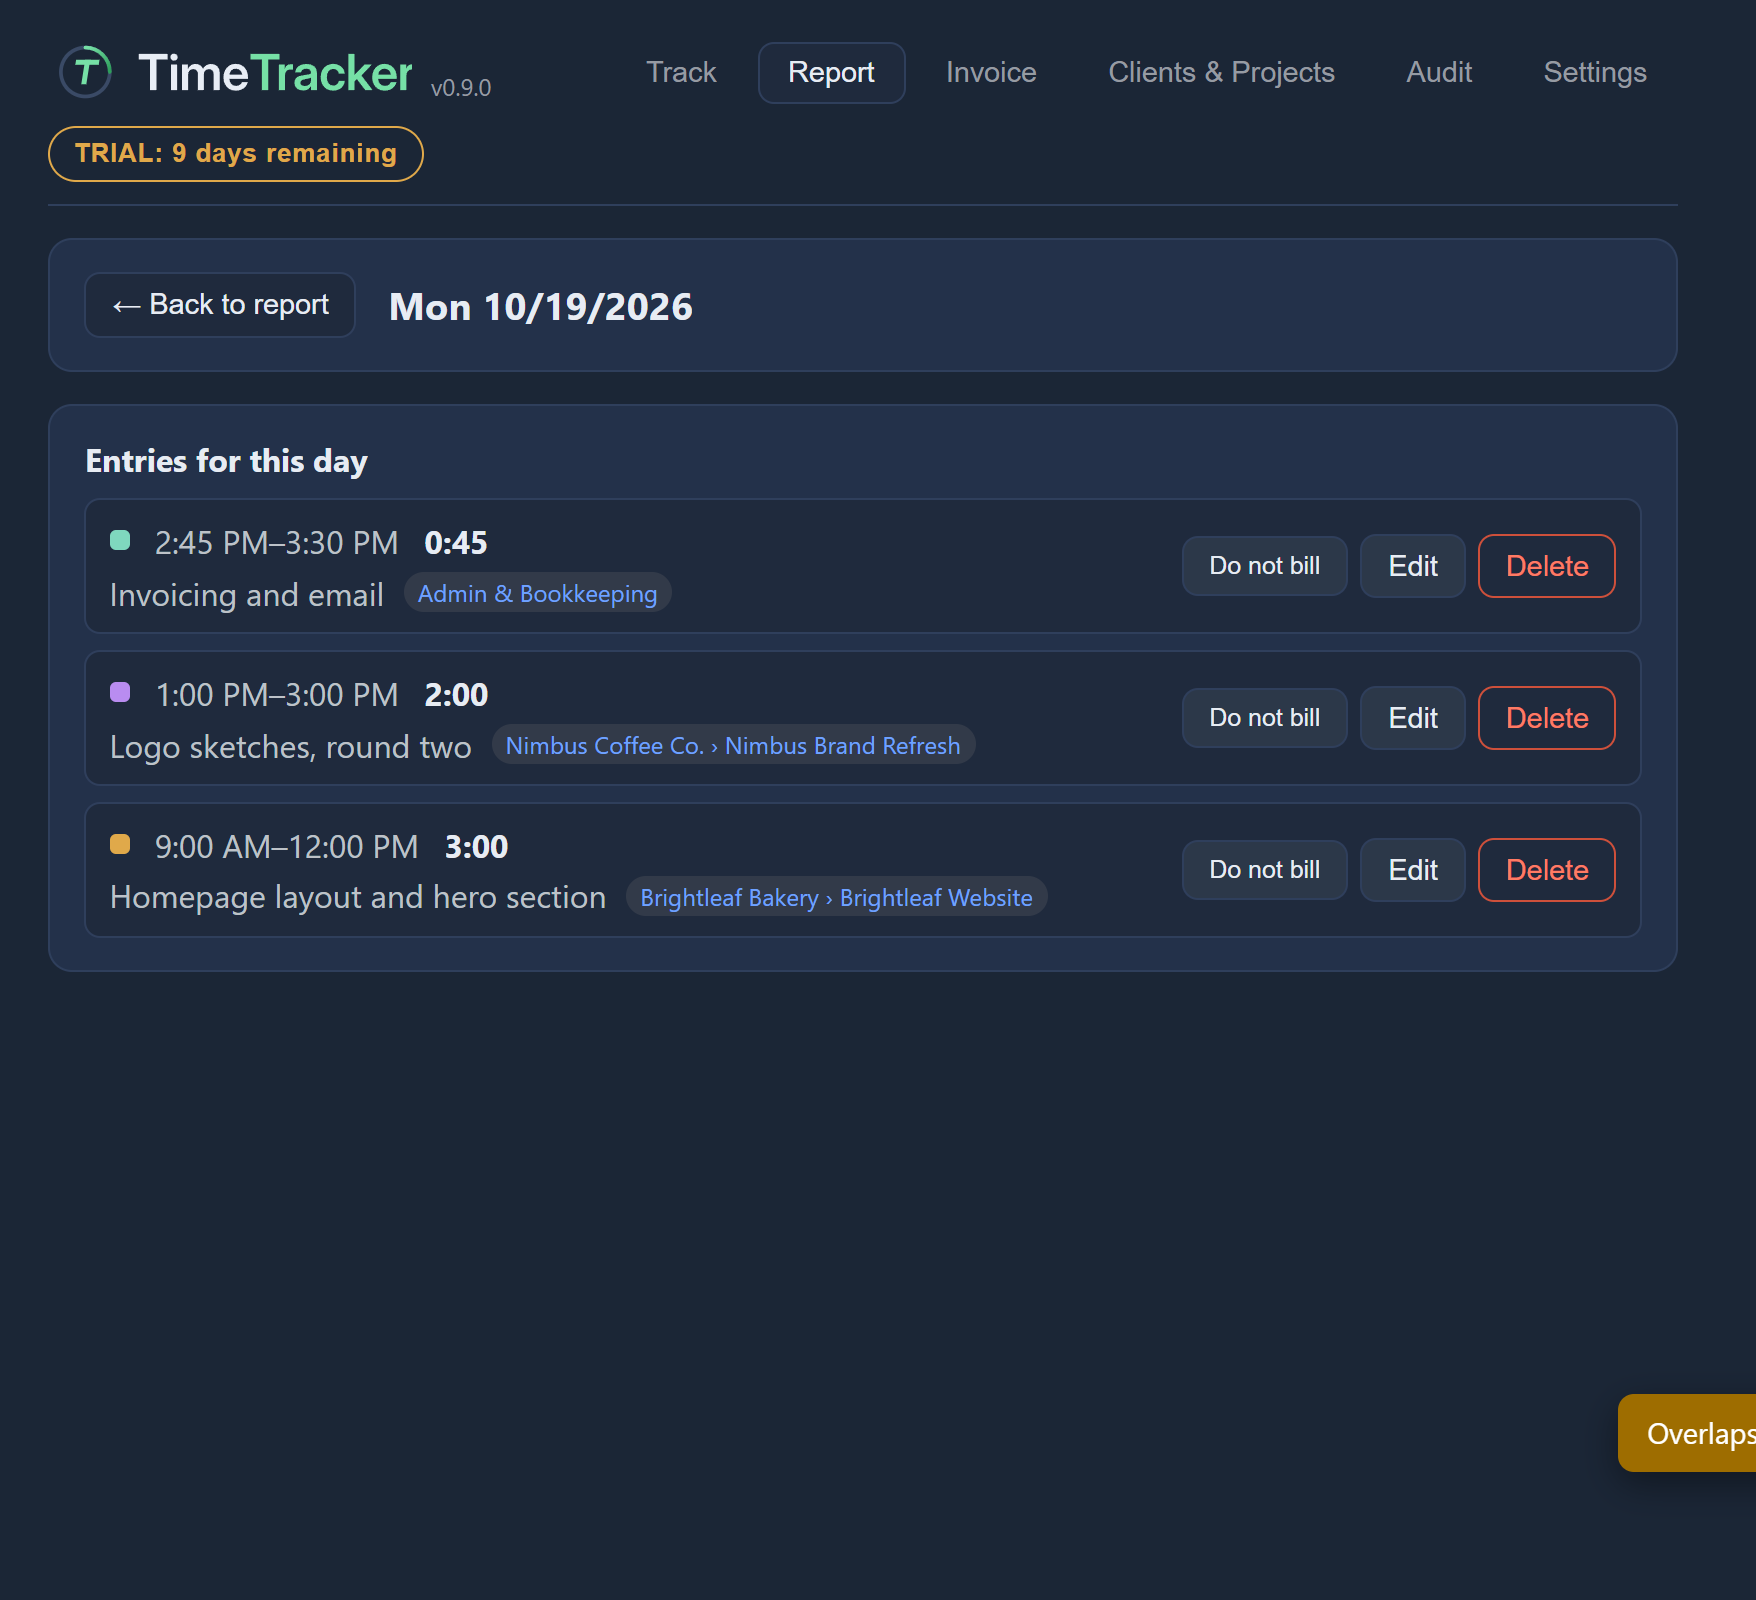
Under the timer is a list of your entries. Each one shows when it started and ended, how long it was, its note, and its project and client. The coloured square is the project’s colour.
Each entry has its own buttons: edit it, mark it do not bill, or delete it. An entry that is already on an invoice links to that invoice. Click the link to open the invoice PDF.

Edit a past entry
You can fix any past entry, from the list on the Track tab or from a day on the Report tab (see Fix a day’s entries).
- Press the entry’s edit button.
- Change the start time, the end time, the summary (the note) or the project.
- Press Save. Cancel closes the form and throws away what you typed.
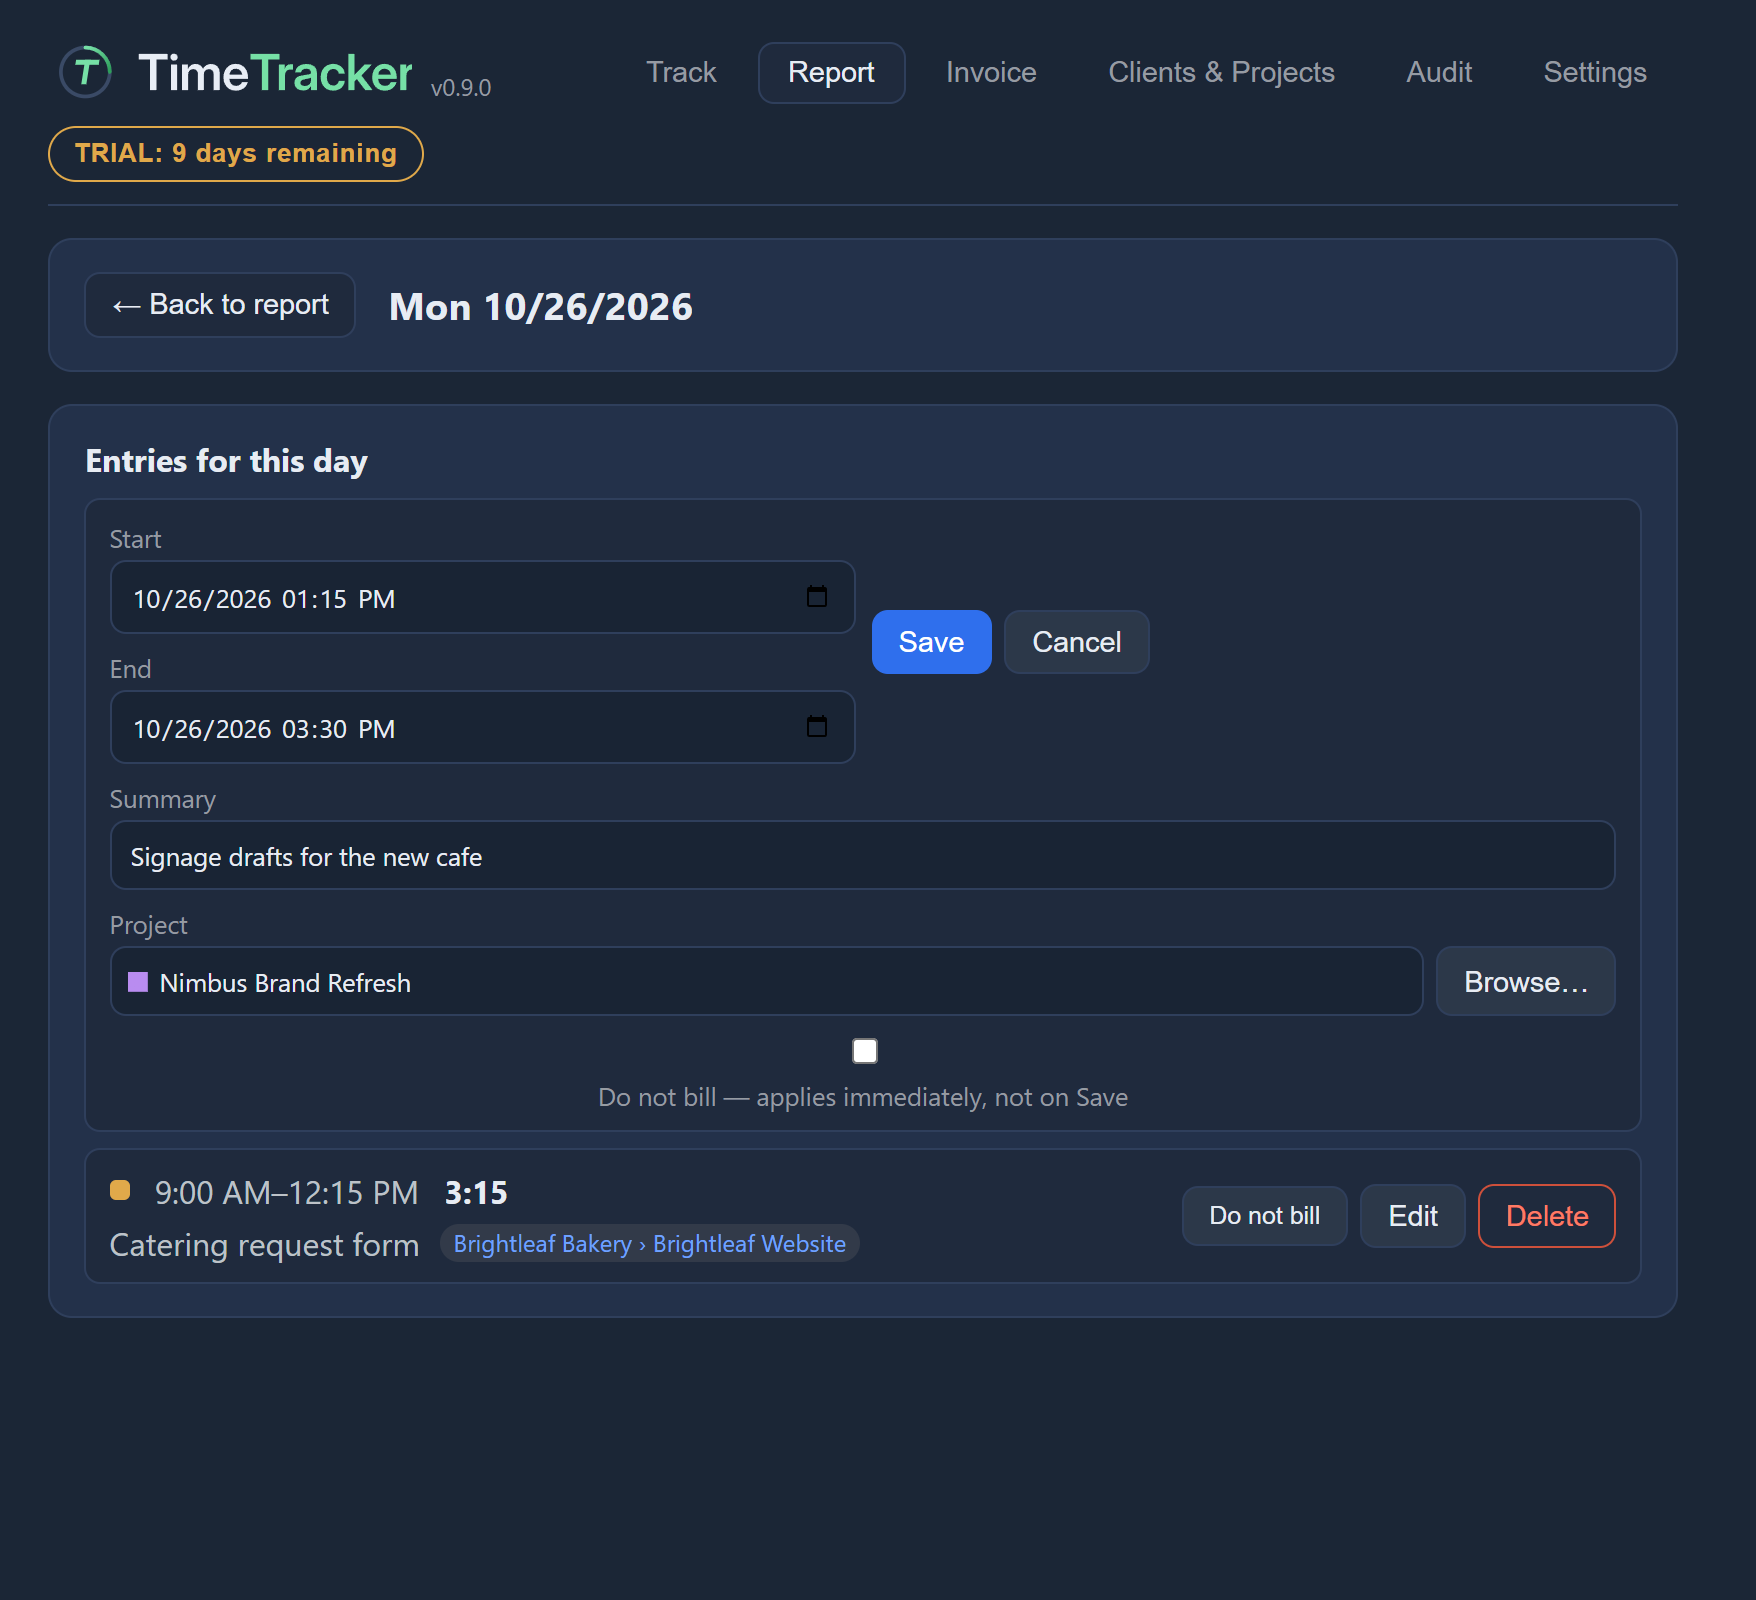
You can’t move a time later than now, because work can’t have been done in the future.
Delete an entry
- Press the entry’s delete button.
- Confirm. If you change your mind, cancel and nothing is deleted.
If the entry is already on an invoice, you must also write a reason. The deletion and your reason are recorded in the audit trail.
Fix overlapping entries
Start task, Switch task and Stop can never make entries overlap. An overlap can only happen when you edit an entry’s times.
If the times you save overlap another entry, TimeTracker still saves them. A yellow message appears at the bottom of the window for a few seconds, naming the entry it overlaps, for example “Overlaps block #42 (09:00–10:30)”.
Entries dated in the future
If an entry ends up with a date in the future, for example because the computer’s clock was wrong when it was made, it is left out of the project’s budget figures.
After a crash or power cut
A running timer survives a crash or a power cut. When you open TimeTracker again, the timer you had running is still there.
If the timer then shows a negative time or “check times”, see Troubleshooting.